Last Updated on January 5, 2024 by Irena Domingo
Applying for a visa to travel to Russia from India, whether for work, business, study or tourism, is not as complicated a process as it may seems. In this article, I’ll explain how to gather all of the documents you’ll need to apply for a visa from your computer in a way that is quick (less than 1 hour) and cost-effective. I also explain the additional requirements for Covid-19.

I'm going to talk about ...
- INTRODUCTION
- 1. INTRO QUESTIONS
- 2. STEPS TO APPLY FOR A RUSSIAN VISA
- Step 1. Have a valid passport
- Step 2. Set your itinerary: Cities and Hotels
- Step 3. Get a letter of invitation or visa support
- Step 4. Fill out the Visa Application Form
- Step 5. Print the form, sign it, and attach a photo
- Step 6. Take all of your documents to the Russian Visa Center (or consulate)
- Step 7. Collect your passport
- Step 8. Travel insurance (optional)
- 3. ADDITIONAL REQUIREMENTS FOR COVID-19
- 4. SUBSEQUENT FORMAL PROCEEDINGS AFTER OBTAINING THE VISA
INTRODUCTION
I’ve had to apply for tourist visas to Russia for family and friends on several different occasions. The process for obtaining a visa to Russia is an extremely bureaucratic one and thanks to this, many companies have taken advantage of the opportunity to do business related to it.
Hundreds of internet articles explain the process for obtaining a Russian visa, but I haven’t found any that clearly explain each step of the process in detail or explain how to complete the process yourself without relying on outside help or intermediaries.
It’s for this reason that I’d like to explain in detail how an Indian citizen can obtain a visa to travel to Russia in an easy and inexpensive way without having to contact intermediary businesses who only add to the overall price of the visa.
Important Notes:
- If you will be traveling to Russia on a trip organized by a travel agency, the agency will likely take care of the entire visa process and simply ask you for the necessary documents. If this is the case, the price will be significantly more than if you file for the visa yourself.
- This article gives a step-by-step explanation of how to obtain a Russian visa on your own in India. The process is very similar in other countries, although there may be some slight differences.
1. INTRO QUESTIONS
Before going into detail about the Russian visa application process, it’s important to answer a few questions in order to better understand the procedures.
1.1. What is a visa and who should request one?
A visa is nothing more than authorization for a citizen of a foreign country to enter, stay in, or pass through the territory of the Russian Federation. It is a document that adheres to your passport and looks something like this:

If you are from India, you will need to obtain a visa in order to travel to Russia. However, people from countries that have bilateral agreements with Russia are exempt from needing to obtain a visa. For example, those with passports from ex-USSR states like Azerbaijan, Armenia, Belarus, Ukraine, etc. are allowed to enter Russian territory using ordinary passports from their respective countries.
1.2. What types of visas exist?
Depending on the purpose of the entry you’re making, the Russian Federation issues 7 types of visas:
- Tourist. This is the most common visa and as the name indicates, it is issued for stays that are for tourism purposes. Indian citizens can apply for a multiple entry tourist visa valid for up to 180 days. Note that total period of stay in Russia for holders of multiple entry tourist visa cannot exceed 90 days within each period of 180 days, from the start date of the visa’s validity, and the duration of each visit to the Russian Federation must not exceed 30 days.
- Business. This type is for trips to Russia that are professional in nature and have a commercial purpose or are used to do business.
- Student. This is issued to those who are studying in the Russian Federation.
- Work. Visa that permits a person to work in Russia.
- Humanitarian. Issued for stays with for the purpose of cultural exchange, sporting events, scientific/technological, socio-political, religious or humanitarian missions.
- Private Visas. These are issued to guests of Russian Nationals who reside within the territory of the Russian Federation.
- Transit. Used to pass through the Russian Federation in order to reach another country (this is not necessary for foreigners who have a layover in an airport given that they don’t leave the international area or for those who fly over the territory without a layover).
In general, all visas are processed in a similar way. The only difference worth mentioning is the obtaining of the so-called letter of invitation that, in the case of a tourist visa, is issued by the hotel where you are staying or, in the case of a business visa, must be issued by a Russian company that has invited you to visit and in the case of a student visa, the Russian educational institution where the person will be attending.
1.3. Where is the visa processed?
As an individual, you can have your visa processed at any consulate of the Russian Embassy in India (which can be found in New Delhi, Chennai, Mumbai, and Kolkata) as well as at the Russian Visa Center in India, an independent business that is subcontracted by the Russian Embassy in India which also has delegations in these same cities.
Russian consulates in India recommend applying for a visa at Russian Visa Centers, established to enhance the quality of service, as well as to facilitate visa procedure.
Companies and organizations, including travel agencies and any other entities applying for visas on behalf of customers or employees, regardless of the purpose of visit to Russia, must apply through the Visa Centers only. Individual foreign citizens have the right to apply directly to the Consular Division of the Embassy of the Russian Federation or the nearest Consulate General of the Russian Federation to obtain a visa for themselves and the closest relatives by making a prior appointment.
Let’s talk about the advantages and inconveniences of processing a visa at each of these sites.
Option 1: Consulates of the Russian Federation in India
In India you can visit a consulate of the Russian Federation depending on which state you live in:
| 1. CONSULAR DIVISION OF THE EMBASSY OF THE RUSSIAN FEDERATION IN NEW DELHI
(NCT Delhi, Haryana, Jammu & Kashmir, Punjab, Rajasthan, Uttarakhand and Uttar Pradesh) | |
| Address and schedules | Consular Division of the Embassy of the Russian Federation, Nyaya Marg, Chanakyapuri, New Delhi 110021, India
VISITOR HOURS OF THE CONSULAR SECTION:
|
| Phone: | +91112687 6823 |
| Fax: | +91112687 6823 |
| e-mail: | [email protected] |
| web: | https://india.mid.ru/en/ |
| Social networks: | http://twitter.com/RusEmbIndia
|
| 2. CONSULATE GENERAL OF THE RUSSIAN FEDERATION IN CHENNAI
(Andhra Pradesh, Karnataka, Kerala, Tamil Nadu and Puducherry) | |
| Address and schedules: | Consulate General of the Russian Federation in Chennai (Madras), 14, Santhome High Road, Chennai, 600004, India
|
| Phone: | +91(44)2493-2320, +91(44)2498-2330 |
| Fax: | +91(44)2498-2336 |
| e-mail: | [email protected] |
| web: | http://chennai.mid.ru/ |
| Social networks: | https://www.facebook.com/CGruschennai |
| 3. CONSULATE GENERAL OF THE RUSSIAN FEDERATION IN MUMBAI
(Goa, Gujarat, Madhya Pradesh, Maharashtra, Chattisgarh and Daman & Diu) | |
| Address: | Consulate General of the Russian Federation in Mumbai, 42, Jagmohandas Marg (Nepean Sea Road) Mumbai, 400006, India
|
| Phone: | +91(22)2363-3627, +91(22)2363-3628 |
| Fax: | +91(22)2363-0403 |
| e-mail: | [email protected] |
| web: | https://russiaconsulmumbai.mid.ru/en_GB/ |
| Social networks: | https://www.facebook.com/rusconsulatemumbai |
| 4. CONSULATE GENERAL OF THE RUSSIAN FEDERATION IN KOLKATA
(Arunachal Pradesh, Assam, Bihar, Jharkhand, Manipur, Meghalaya, Mizoram, Nagaland, Odisha, Sikkim, Tripura, West Bengal and Andaman & Nicobar Islands) | |
| Address an schedules: | Consulate General of the Russian Federation in Kolkata, 22A, Raja Santosh Road, Alipore, Kolkata, 700027, India
|
| Phone: | +91(33)2479-7006 |
| Fax: | +91(33)2479-8889 |
| e-mail: | [email protected] |
| web: | http://www.kolkata.mid.ru |
| Social networks: | https://www.facebook.com/pages/Генеральное-консульство-Российской-Федерации-в-Калькутте/192888114168476 |
Advantages and disadvantages of requesting a Russian visa at consulates:
Advantages
- The only advantage of applying for your visa in one of these consulate offices is that it is a little bit cheaper. The normal processing of a visa costs 6,480 INR, while expedited processing costs 12,960 INR. You do not have to pay the 2,200 INR administrative cost that is applied at the Russian Visa Centers.
Disadvantages
- You must request an appointment in advance and it is likely that it will take a while to get one
- Customer service is not a strong suit of the consulates
- The application must be done through an interview process (it cannot be done through the mail or courier service).
- If you are missing a single document or something is done poorly, you will have to return on another day as the consulates do not provide additional services like completion or correction of forms, photocopying, or photo and mailing services.
- Not all consulates give appointments in advance for tourist visas and instead recommend that these be processed at the Russian Visa Center.
Option 2: Russian Visa Centers
During the last few years, the number of visas to Russia from India has greatly increased. Because of this, and to streamline the process, authorization to manage and process Russian visas was given to the Russian Visa Center, an entity managed since February 1, 2020 by the private company, Artionis, which handles visas for the residents of India (until January 31, 2020 the company that managed visas was Indra Visa Fiduciary Services Pvt. Ltd – VFS Global).
Since then, the Russian Visa Center has been allowed to process visas used to travel to Russia. They are available inNew Delhi, Chennai, Mumbai, and Kolkata, that is, in the same cities where the Russian consulates of India are located.
The Russian Visa Center acts as an intermediary between the applicant and the consular section by receiving documents, verifying they are correct and complete, and sending them to the consular section to have them processed. However, the final decision to approve or deny a visa application still comes from the Consulate.
- Russian Visa Center in India (Artionis): https://russia-visacentre.com/en/visa/india/russia
- Address and schedules: https://russia-visacentre.com/en/visa/india/russia/contact-us
The individual consular sections recommend on their websites that you apply for a visa at the Russian Visa Center, as this significantly lightens their workload.
All other websites that offer Russian visa are NOT AUTHORIZED AGENCIES but simply private companies that act as intermediaries and make the final cost of the visa a lot more.
Advantages
- Better Hours of Business: Mon-Fri, 09:00 to 17:00 (closed on Saturday and Sunday)
- In the offices, they offer additional services for purchase that are not available at the consulates: completion of application forms, photocopying, courier delivery of passport, etc. Everything is set up so that you don’t have to come back on another day (and of course do business).
Disadvantages
- In exchange for better service, the price of the visa is greater since applying requires additional management and a cost of 2,200 INR per visa is added.
I have always applied for visas through the Russian Visa Center since it is the most effective and fastest place to apply to get a visa. Even more, if you forget a copy or haven’t filled out the form correctly or need a photo, the Visa Center can provide any of these services so that you don’t have to come back on a different day.
In contrast, at the consulate sections, you often have to wait a long time for them to give you an appointment. In addition, in the case of a tourist visa, some consulate offices don’t even accept applications directly and refer you to the Russian Visa Central anyway.

Option 3: Private agencies
One last option is to use the services of a private agency, which will be in charge of carrying out the whole process of managing the visa. The main advantage is the comfort (you give them your data and they take care of everything). The main drawback is that the price will be higher.
1.4. How much does it cost to get a visa?
The cost for processing a visa is divided into three quantities:
- The actual visa processing fee, called consular taxes: 6,480 INR for an ordinary visa -single entry- (processed within 4-20 working days) or 12,960 INR for an expedited Visa (processed in 1-3 working day).
- Russian Visa Centers in India collect service fee of INR 2,200 per application. The service fee is separate from the consular fee payable to the Russian Consular Institutions.
- In addition to the cost of processing the visa, you must also add the cost of the letter of invitation or visa support, which is also required. The invitation can cost about 3,500 INR . Later I’ll explain how to get one for this price in a PDF format in a few minutes.
The Russian Visa Centre offers express delivery of passports to home/business address by courier. You can book the service while submitting your visa documents directly at the Russian Visa Centre. Extra payment of 500 INR for one passport shall be charged separately from the regular service charge.
I recently processed a visa for a 10 day trip to Russia through the Russia Visa Application Center and the cost was:
- 6,480 INR (consular taxes)
- 2,200 INR (service fee of Russian Visa Centre).
- 3,500 INR for the letter of invitation for each visa
- For a total of 12,180 INR
Note: Double and multiple entry visas are more expensive (Visa Fees).
1.5. How to pay?
At the Consulate visa charges are paid to the Cashier of the Visa Section upon the Visa Officer’s direction and in cash only. A receipt is issued to the applicant.
At the Visa center office you can pay the visa fee in cash, or by credit/debit card..
1.6. When should I start applying to get a visa?
Applying for a visa and gathering the necessary documentation can take some time, so I recommend beginning the process about 5 or 6 weeks ahead of time. Although, if you already have a passport and electronic copies of your documents, as I explain in this article, it is possible to get through the process in less time.
2. STEPS TO APPLY FOR A RUSSIAN VISA
When applying for a visa, you must provide the following information:
- Passport (must be the original).
- Letter of invitation or visa support (A ‘Tourist voucher’ and a ‘Tourist confirmation’ document stamped and signed by authorized person. They can be obtained through your hotel or an approved travel agent who deals with trips to Russia). Please note: 2 copies of tourist confirmation is required for submission at Chennai consulate.
- The electronically completed Visa application form (you must print, sign, and attach a passport-sized photo)
Next I’ll explain the step-by-step process of obtaining your visa. Remember that the visa application form must be filled out with information from your letter of invitation and must clearly state the dates of your visit and which cities you will be staying in. Because of this, it’s better to gather your documents and complete the form once you have all of the information you need for the visa application.
Step 1. Have a valid passport
To apply for a visa, you must have a Passport which should be valid for a minimum of six months after visa’s expiration date and has at least 2 blank pages which do not need to be consecutive.
Your passport must not present any type of deterioration such as being torn on the cover, be stained or having broken pages. In these cases it is better to renew the passport before applying for the visa, since in the consulate they are usually very strict and they won’t approve the visa if the passport is damaged.
To apply for the Russian visa you must submit your original passport, which will remain in the hands of the Consulate for a few days. This is because the visa will be attached to one of the pages of your passport.
In addition to the original passport, you must also send a good quality copy of the passport page indicating your personal information and photo (both on one side of an A4 sheet).
Step 2. Set your itinerary: Cities and Hotels
Your visa must include your entry and exit dates meaning the first and last date that you will be in the country. This means you will need to know the dates of your trip before applying for your visa.
You do not have to buy tickets in order to get a visa. You can buy airline tickets before or after obtaining a visa.
Once you know your entry and exit dates, you should outline your itinerary and plan out the cities you want to visit and the hotels or apartments where you’ll be staying:
- On the visa application form, you have to include the cities you are going to stay as well as whether you will be making multiple entries. The most common type is a single-entry visa but you may also want to visit Finland and then return to St. Petersburg or visit a country that borders Russia like China and Mongolia by taking the Trans-Siberian railway. You may also want to visit Latvia, Estonia, Ukraine, Kazakhstan or Georgia. In these cases you will need a double-entry visa. If so, you need to be very clear about where you will be going and what dates you will be entering or exiting the country.
- Note: In India double-entry tourist visas are issued for trips including exit to Russia’s bordering countries only. Additional documents may be required: an air ticket and a visa, or any other document allowing entry to the country of the second destination (original+copy).
- There is nothing wrong with asking for a visa for a longer period of time than the planned stay. Just make sure that your exit and entry dates are included within the date range that is listed on your visa.
- To get a letter of invitation or visa support (later I’ll explain in greater detail what this is), you will need to know which hotels or apartments you will be staying in. However, once you arrive, it doesn’t matter if you end up staying in a different hotel or Airbnb apartment (say you find one that’s cheaper or better quality).
To book accommodation I always use Zenhotels, a Russian booking platform in which you can find wide variety of accommodation and very good deals. Other good option is Booking.com
Many people ask me about hotels to stay in Russia. Well, I made a short list of hotels I recommend as value for money is very good:
Moscow
- Ibis Moscow Centre Bakhrushina (3 stars)
- Novotel Moscow Centre (4 stars)
- Novotel Moscow City (4 stars)
- Radisson Royal Hotel (5 stars)
St. Petersburg
- Ibis St Petersburg Centre (3 stars)
- Novotel St Petersburg Centre (4 stars)
- Park Inn by Radisson Nevsky (4 stars)
- Radisson Royal Hotel (5 stars)
More info about accommodations in Rusia in this article: Accommodations in Russia: How to choose and where to make a reservation cheaply.
You will need hotel reservations. Platforms such as Booking allow you to make reservations that allow you to cancel until the day before the trip. In this way, to apply for a visa you can make hotel reservations with Booking (with free cancellation), so that once you obtain the visa you can (if you want) change to another hotel or an Airbnb apartment.
Example of booking conformation:
A typical example itinerary for a trip to Russia:
- Trip Dates: September 21-30, 2020 (10 days)
- Stay in Saint Petersburg from September 21-24
- Travel on the Red Arrow night train from Saint Petersburg to Moscow during the night of September 24 (I recommend that you get tickets for the train electronically through the RZD Russian trains website instead of using a third party).
- Stay in Moscow from September 25-30.
- Another example: Organizing a Trans-Siberian Train Trip
Step 3. Get a letter of invitation or visa support
The letter of invitation (also known as the visa support letter) is the most important document but also the most controversial. The letter of invitation should not be confused for a hotel reservation. They are not the same.
This document is needed to apply for a visa and must be issued by a Russian person, institution, hotel, or business who has invited you to visit them. A Russian family member, university you’ll be attending, a business or a hotel where you will be staying can provide you with the letter.
Visa support is the most common support received when getting a tourist visa. This document is issued by the hotel in which you’ll be staying and is printed on an A4 page. It is divided in two separate but similar parts:
- The Tourist Services Contract (tourist voucher) is the document that states that you have hired a Russian hotel service. This part will show your personal information, the cities you will be visiting, as well as the services you will receive from the hotel and the proof that you have paid for a reservation.
- The Foreign Tourist Reception Confirmation (confirmation letter), as the name indicates, confirms you will use the hotel during your visit. It also includes personal information and the accommodations you’ll be provided with during your stay.

How do you get visa support for a tourist trip? There are two options:
Option 1. Ask for it directly from the Hotel, they can either fax or email it to you, and usually charge a fee (at least 4,500 INR).
Option 2. Getting a letter of invitation on your own.If you simply want to do things faster and cheaper, there are some agencies that can quickly provide the letter online. The advantage of this option is that once you have obtained the visa, you can change hotels.
In the latest letters of invitation that I’ve received online, I put 2 hotels with free cancellation to process the visa, but a few days before the trip I canceled them and booked other accommodations.
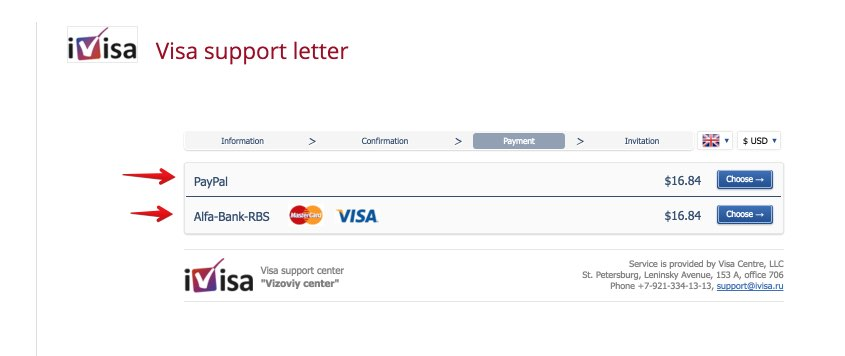
The best option that I used to get an invitation letter is iVisaOnline. The system of issuing visa support is fully automated. You receive the invitation letter in a few minutes after paying (in PDF format ready to print). You can pay by credit card or Paypal. Currently, the price is about 3,500 INR each visa support.
The process of purchasing visa support can be done through this link
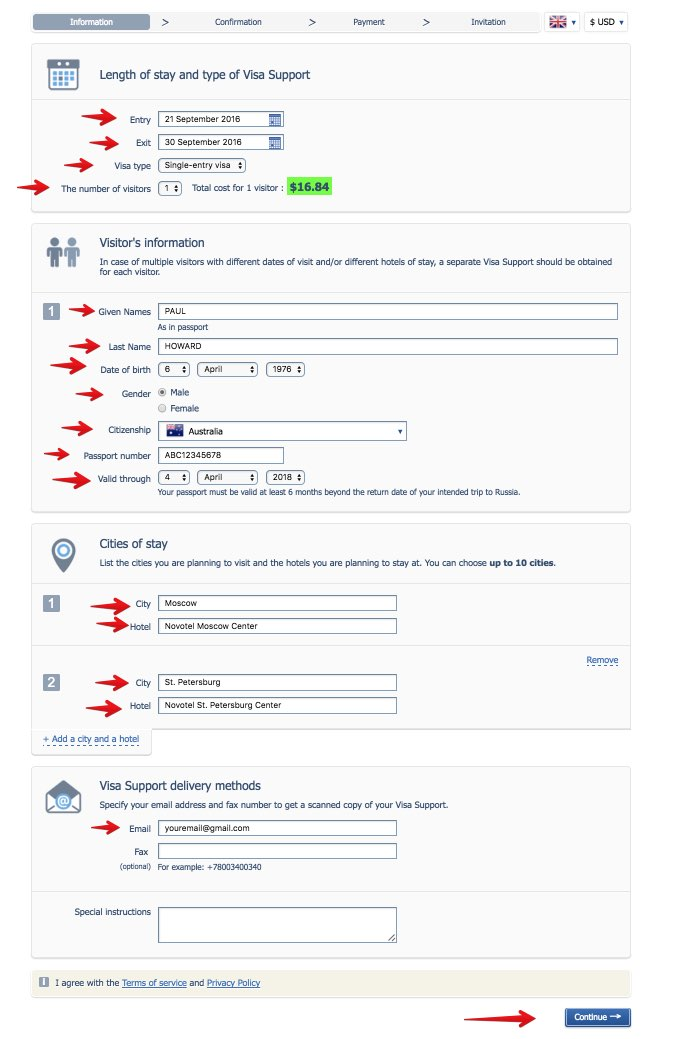
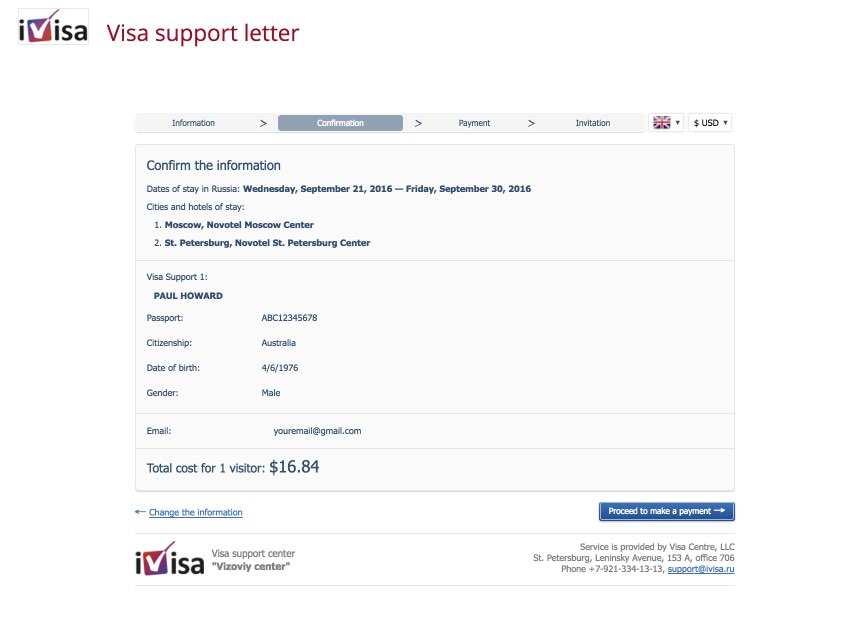
After payment you can download the invitation letter in PDF format. You will also receive the invitation in your email. An example of a visa support:
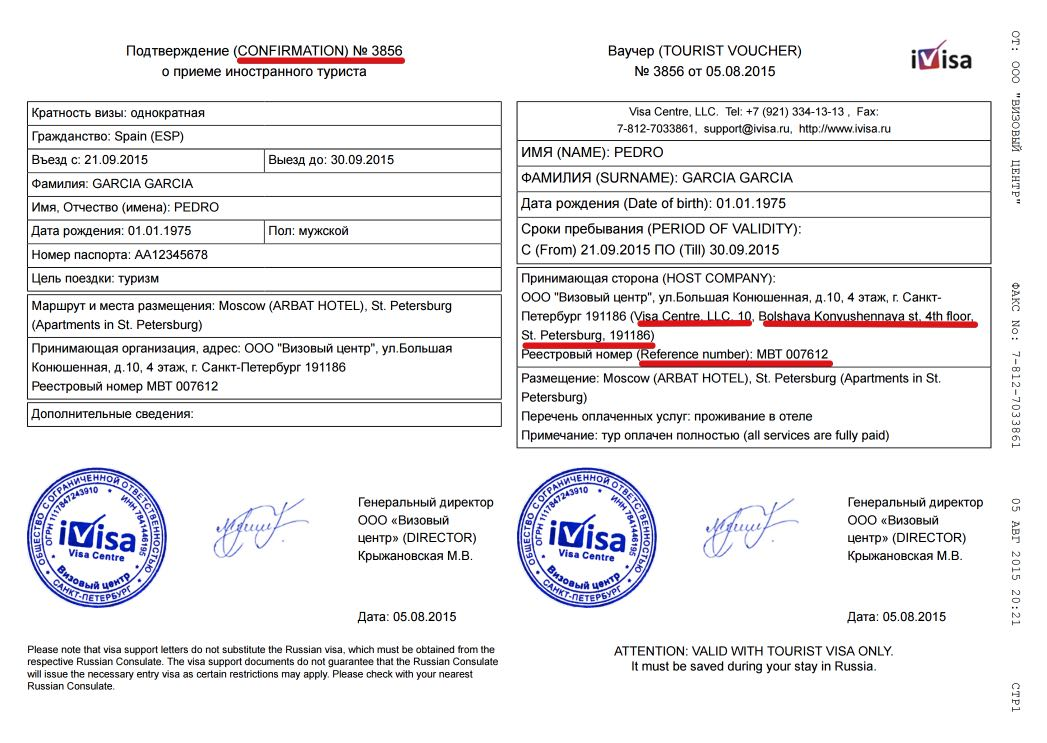
The information you need to fill out the visa application form:
- Name of organization: Visa Centre, LLC
- Address: 10, Bolshaya Konyushennaya st, 4th floor, St. Petersburg
- Reference number: 007612
- Confirmation number: in the above example is 3856 but note that it is different for each visa support.
IMPORTANT. You can stay in Russia for up to one month (30 days) on a tourist visa. However, if the trip duration is more than 14 days, the Consular Offices of the Russian Federation in the Republic of India temporarily request the applicants to additionally submit:
- A detailed itinerary of your entire stay provided by the travel company which is arranging your trip (for example, iVisa)
- Documental proof of the full payment for the tourist services (invoice in your name, receipt or statement from your bank account if you paid by credit card or through bank transfer).
Step 4. Fill out the Visa Application Form
Once you have all of the information you need as far as dates, entries/exits, a current passport, and your letter of invitation, you are ready to fill out the visa application form.
The form can be filled out electronically by visiting this link: https://visa.kdmid.ru/
The application should include your personal information, the purpose of your visit (tourism, business, study, etc.), your itinerary and dates, your insurance policy information and other information that I’ll show you here.
When you go to fill out the form for the first time, you should select your country (India) and the language you would like to continue in. Also mark in the box that you have read the introductory information. Next, click Complete new application form.
You can leave your form incomplete and come back another day but make sure to write down the code you are given in reference to your account since you will need it, along with your last name and answer to your security question, in order to log back in to your account. If you forget your code, you will have to fill out a new application.
You have to choose a password that contains numbers and letters. For example: ma1234568am
The first information they will ask on the application under the “Visa details” section are:
- Nationality
- If you had USSR or Russian nationality at some time
- Purpose of visit and visa category and type
- Number of entries (single or multiple)
- Date of entry into Russia / Date of exit
Once you have filled out this information, click the Next button:
On the next page, you should input your personal information in capital letters as it appears on your passport:
- Surname (as in passport)
- First name (as in passport)
- If you have ever had other names: maiden names, pseudonym, holy order, etc.
- Sex
- Date of birth
- Place of birth
- You must specify whether you were born in Russia
On the next page, finish entering the information from your passport:
- Passport number
- Date of issue
- Date of expiry
In the section that says Visit details, you should include the following information from your visa support that I mentioned earlier:
- Travel company (in the case of tourist visa)
- Name of organization
- Address
- Reference number
- Confirmation number
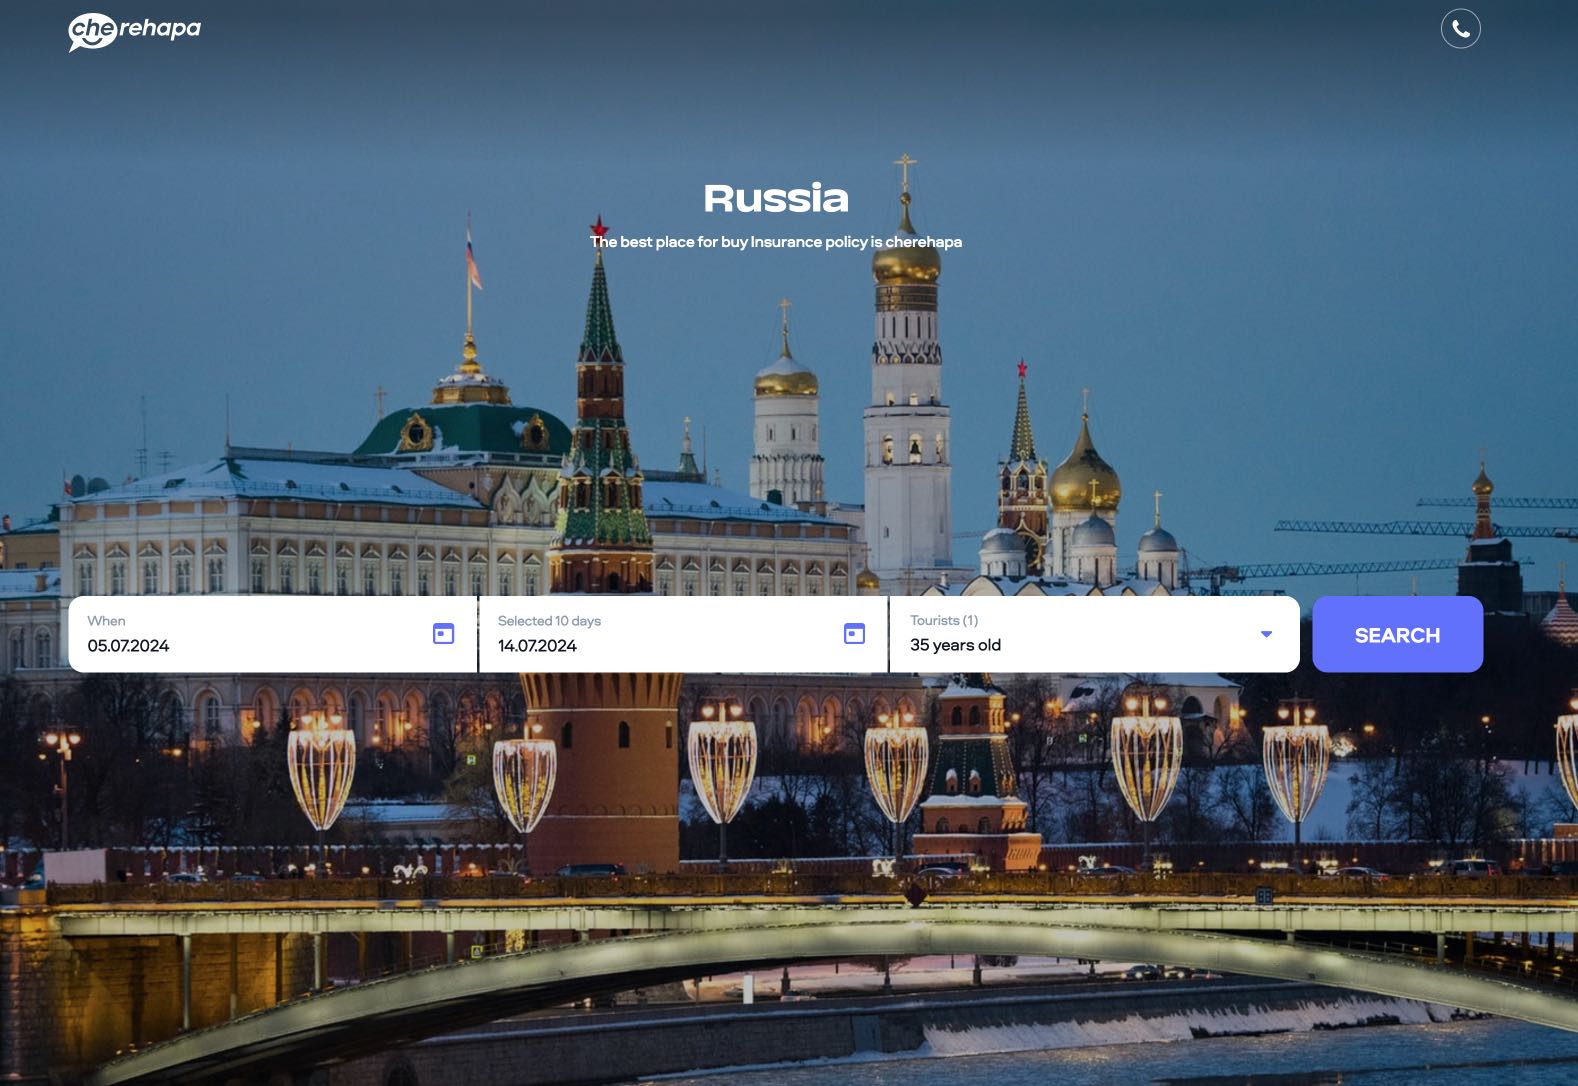
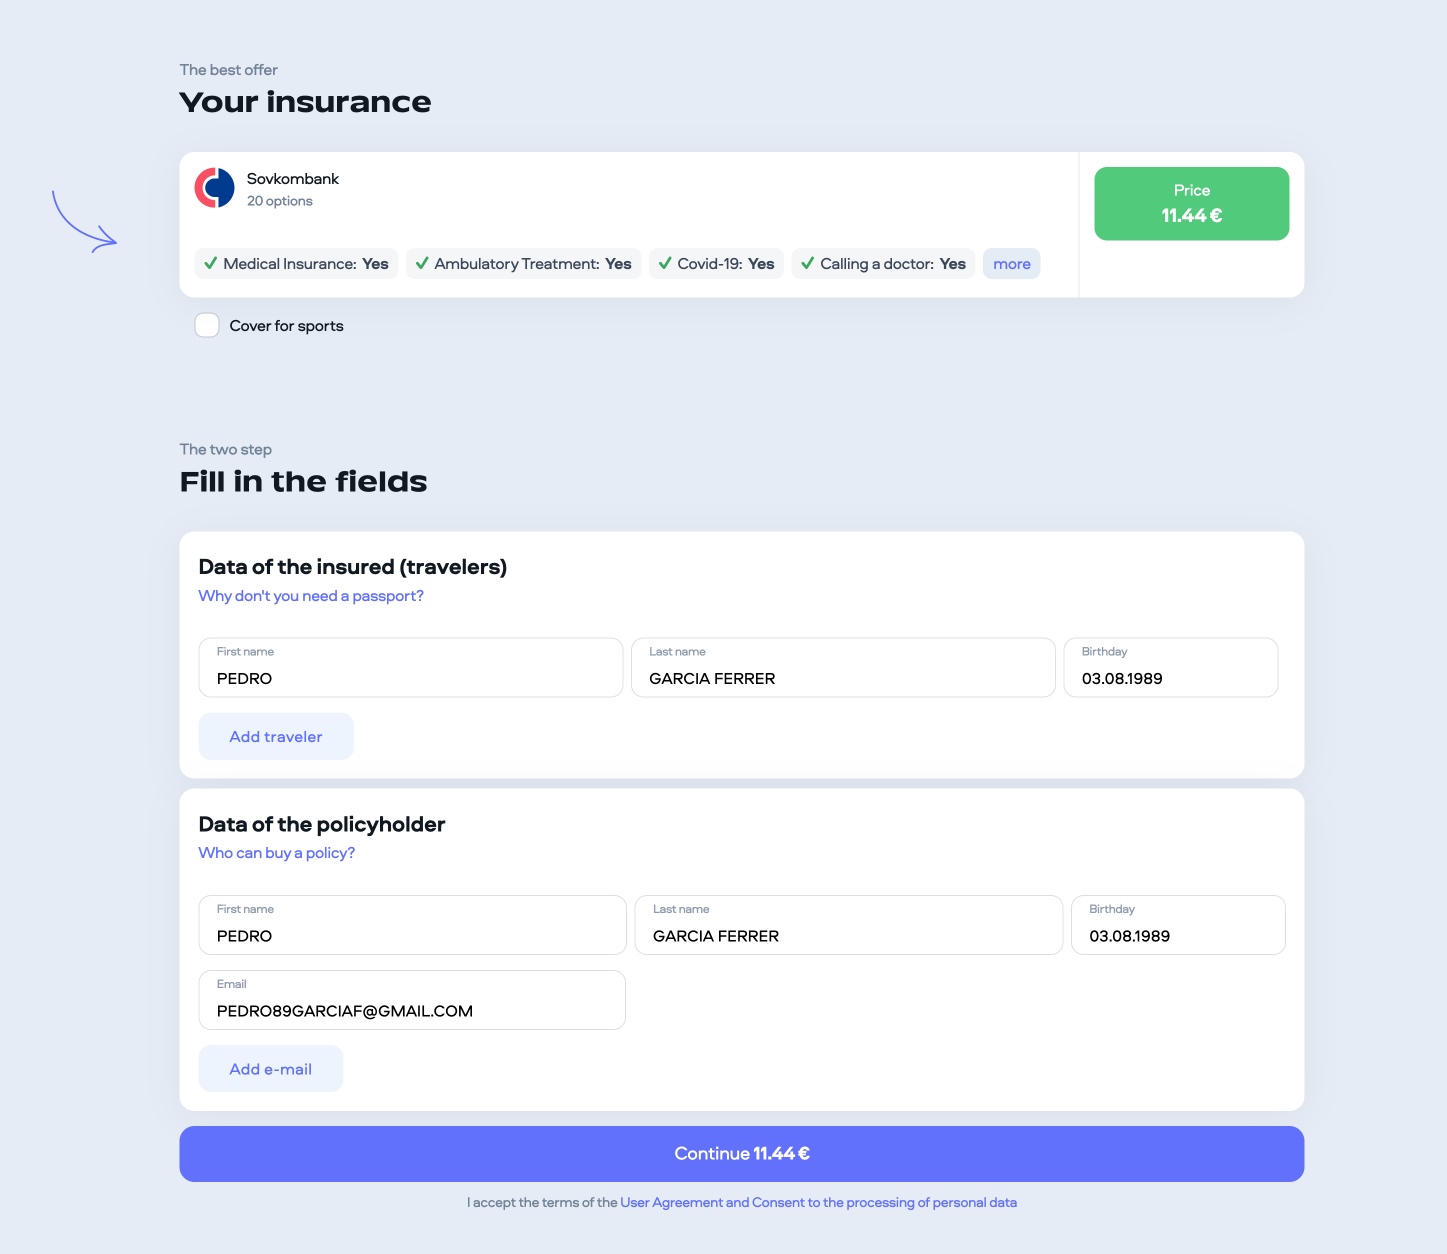
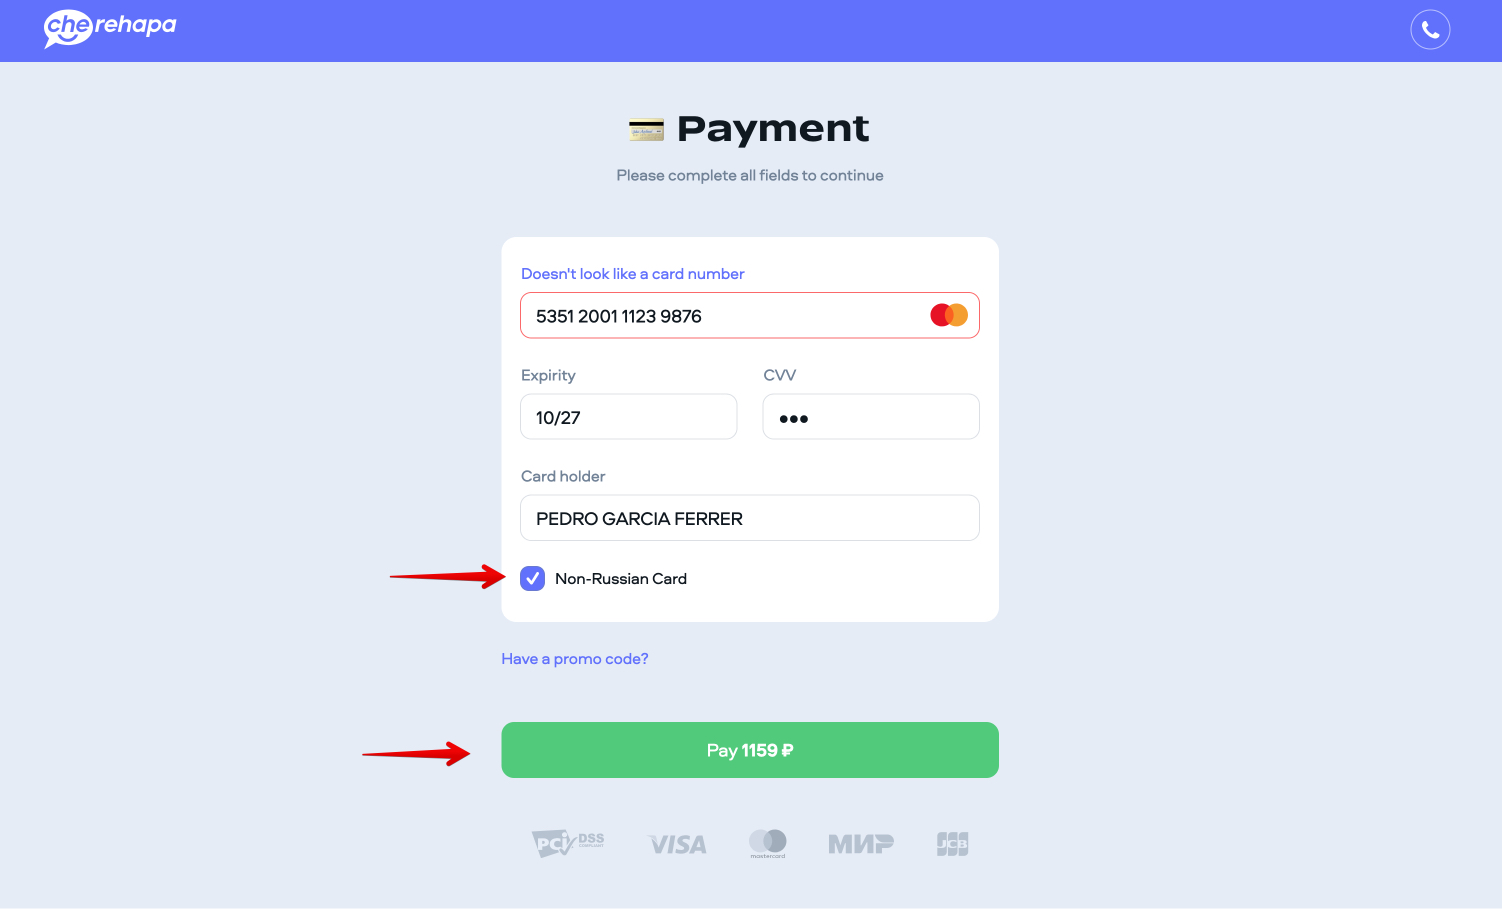
You should also include information from your itinerary (cities you’ll visit) as well as the name of your insurance company. It’s always recommended that you have traveler’s insurance (For example, Cherehapa).
To continue, you will need to enter your contact information, and the company where you work or school where you study. The required fields are marked with a red asterisk. If applicable, you should indicate whether you have relatives in Russia.
Lastly, select the place where you will be processing your visa application. You can select any consulate or Russian Visa Center in your area:
Once you have finished entering all of the information, a summary will appear in case you would like to change something. If all of the information looks correct, click the Save button.
On the next page, you’ll see that you can download the completed form as a PDF. Simply click on the A4 Print button.
In this pretend example, that I just finished, the results would look like this:
As you can see in this form, most of the information that you’ve entered will appear. If you would like to see what the PDF will look like, you can download it at this link: Visa Application Example (PDF).
Step 5. Print the form, sign it, and attach a photo
Print the completed form, write the date, and don’t forget to sign it and attach a photo.
PHOTO SPECIFICATIONS. One colour photograph 3.5 x 4.5 cm with light-coloured background, clear image of the applicant directly facing the camera, without dark/ tinted glasses or any headgear (with the exception of persons who wear such headgear due to their ethnic/ religious background, and are seen wearing the same in their passport photo).
IMPORTANT. The signature must be the same as the one in the passport
Step 6. Take all of your documents to the Russian Visa Center (or consulate)
Once you have of your documents, the final step is to take everything to the Visa Application Center or Consulate, depending on which state you live in (New Delhi, Chennai, Mumbai, and Kolkata).
- CONSULAR DIVISION OF THE EMBASSY OF THE RUSSIAN FEDERATION IN NEW DELHI: NCT Delhi, Haryana, Jammu & Kashmir, Punjab, Rajasthan, Uttarakhand and Uttar Pradesh.
- CONSULATE GENERAL OF THE RUSSIAN FEDERATION IN CHENNAI: Andhra Pradesh, Karnataka, Kerala, Tamil Nadu and Puducherry.
- CONSULATE GENERAL OF THE RUSSIAN FEDERATION IN MUMBAI: Goa, Gujarat, Madhya Pradesh, Maharashtra, Chattisgarh and Daman & Diu.
- CONSULATE GENERAL OF THE RUSSIAN FEDERATION IN KOLKATA: Arunachal Pradesh, Assam, Bihar, Jharkhand, Manipur, Meghalaya, Mizoram, Nagaland, Odisha, Sikkim, Tripura, West Bengal and Andaman & Nicobar Islands.
You can submit documents on behalf of another person, but note that you will have to submit a duly attested power of attorney letter from the applicant.
If you can not travel personally, you can count the services of an agency that can do the procedures for you, although this will involve a higher cost.
Step 7. Collect your passport
Once you have sent in your documents to the Russian Visa Center or Consulate, they will give you a date on a receipt when you can return to pick up your visa.
The Russian Visa Centre offers express delivery of passports to home/business address by courier. You can book the service while submitting your visa documents directly at the Russian Visa Centre (extra payment of 500 INR).
Step 8. Travel insurance (optional)
Indian citizens are not required to present traveler’s medical insurance in order to receive a visa though it is recommend that you have travel insurance that will cover anything that may happen during your trip (medical expenses, cancellation costs, etc.)
A very good option is Cherehapa, a Russian company specializing in travel insurance. You can buy, extend and claim online your travel insurance to Russia, even after you’ve left home. The insurance has a medical expenses coverage of 35,000 euros (Covid-19 insurance coverage included).
3. ADDITIONAL REQUIREMENTS FOR COVID-19
Once you have obtained the visa and before boarding the plane, you must take into account the additional requirements for Covid-19 that must be met:
Every passenger must show a printed medical document (in English or Russian), confirming a negative PCR test for COVID-19 no older than 48 hours, at the check-in and then at the border of the Russian Federation. Since 4 September 2021 the 14-days isolation for those arriving to Russia is no longer required.Since October 2022, PCR test is no longer needed.- Complete, before entering Russia, a simple questionnaire that you can download on the website of the Federal Service for the Supervision of Consumer Protection and Welfare (Rospotrebnadzor): https://www.rospotrebnadzor.ru/files/news/авиаАнкета%20RUS.docx
4. SUBSEQUENT FORMAL PROCEEDINGS AFTER OBTAINING THE VISA
Once you have the visa and the Covid-19 documentation, you should bear in mind that there are two additional steps that must be done once you get to Russia: the immigration card and visa registration. The first thing is usually completed by the customs officer and the second the hotel where you will stay.
It is important to always carry both the passport and the immigration card while traveling, and the accreditation of the registry in case it may be required from you on the street by the police (it is rare for them to do so, though).
4.1. Immigration card
Once you enter the territory of the Russian Federation, you must fill out the immigration card, though in practice, at large airports, it is usually the immigration service which takes care of it (either digitally or manually). It is done during passport control.
The immigration card is a paper which consists of two equal parts that are the size of a passport page. One of the parts is kept by the border police and the second will be delivered to you. It is important that you keep this card as they will ask it to you when you leave the country. In addition, you will also need the immigration card to register the visa, as I explain in the next section.
In the following screenshot you can see how the immigration card looks, which usually comes in Russian and English:
More info about inmigration card: Russian airports: immigration card and customs formalities
4.2. Registration
If you have applied for a tourist visa, you have the obligation to register within the first 7 working days of arrival (excluding weekends and holidays). Before March 2011, the registration must be done within 72 hours, but the new Russian law modified this term. If you are going to stay in Russia less than 7 working days, then you do not need to register.
The purpose of this registry (which comes from the communist era) is to notify immigration authorities of the place where you will stay while you are in Russia. The registration must be done in each of the cities that you are going to visit.
You will need to fill out another registration form. It’s not your obligation to register, but rather the hotel where you are staying or the host of the apartment where you are staying.
If you are staying in a hotel, when you arrive, the hotel itself will register your visa. They will ask you the passport with the visa and immigration card (the one you get at the border when you arrive to the country).
If you will not stay in a hotel, but in a private house, then the Russian host is the one required to register his/her guest at a police station or at the post office. You don’t need to be present in the registry but you must provide your host a copy of the first page of the passport, the visa and the immigration card. You may be charged a small fee for this procedure.
The accreditation registration is not required to leave the country, though the immigration card is required.
In the following screenshot you can see how this form looks. The tourist stays with the bottom part (from the dotted line):
More info about registration: Registration in Russia: What it is and how it is done.
I hope this article has helped you apply for your visa to Russia from India!
If you’ve found it useful, please share. Thank you!